
Looking to attract more guests to your Pensacola and Navarre Beach rental? Strong photos do the heavy lifting. This guide explains how to photograph your home so it stands out and drives more bookings.
From California to the Carolinas and right here in Florida, beaches are beautiful everywhere.
But if you're in the rental business, great photos are what truly set your property apart, and this is especially true in Pensacola and Navarre Beach.
Guests scroll quickly, so your gallery needs to grab attention, tell a story, and feel like a promise delivered. Think bright rooms, sea-salt breezes through open curtains, and textures that invite a closer look. Clean lines, soft colors, and honest angles help travelers picture slow mornings on the balcony and sandy toes at the door.
This is your chance to style, light, and frame each space so it feels welcoming and real.
In a hurry? Here's a gist of what there is to do.
- Prioritize Photos That Sell Your Pensacola and Navarre Beach Rental
- Shoot Every Guest Space, Inside and Out
- Spot the Focal Point and Build Around It
- Chase Daylight and Balance Interior Light
- Stage Warm, Clutter-Free Scenes in Pensacola and Navarre Beach
- Aim Into Corners for Depth
- Use Landscape for Rooms, Portrait for Tall Details
- Lead With a Scroll Stopping Hero Image
- Choose DIY or Hire a Pro in Pensacola and Navarre Beach
- Keep It Honest to Protect Reviews
At Gulf Coast Getaways, we've spent years managing properties right here in Navarre Beach and Pensacola Beach, and we know exactly what it takes to help them thrive. We're not shy about sharing what we've learned along the way!
Ready to create images that boost clicks, confidence, and bookings?
1. The Importance of Photos
Your Thousand Words Just Got a Pay Cut
Photos are the first thing guests judge and the last thing they remember.
Good photography sets expectations and builds trust before guests read a single line. A crisp gallery signals care and professionalism, which matters in competitive Gulf Coast markets. Clear images also justify stronger nightly rates and encourage more confident bookings.
Treat photos as your digital handshake. Bright, sharp images whisper that you are thoughtful and reliable. Dim or blurry pictures suggest shortcuts and uncertainty, which is not the message you want.
Quick Takeaways
- Photos drive first impressions and bookings.
- Clear, bright images build trust quickly.
- Strong galleries support higher nightly rates.
- Weak photos undermine credibility and reduce clicks.
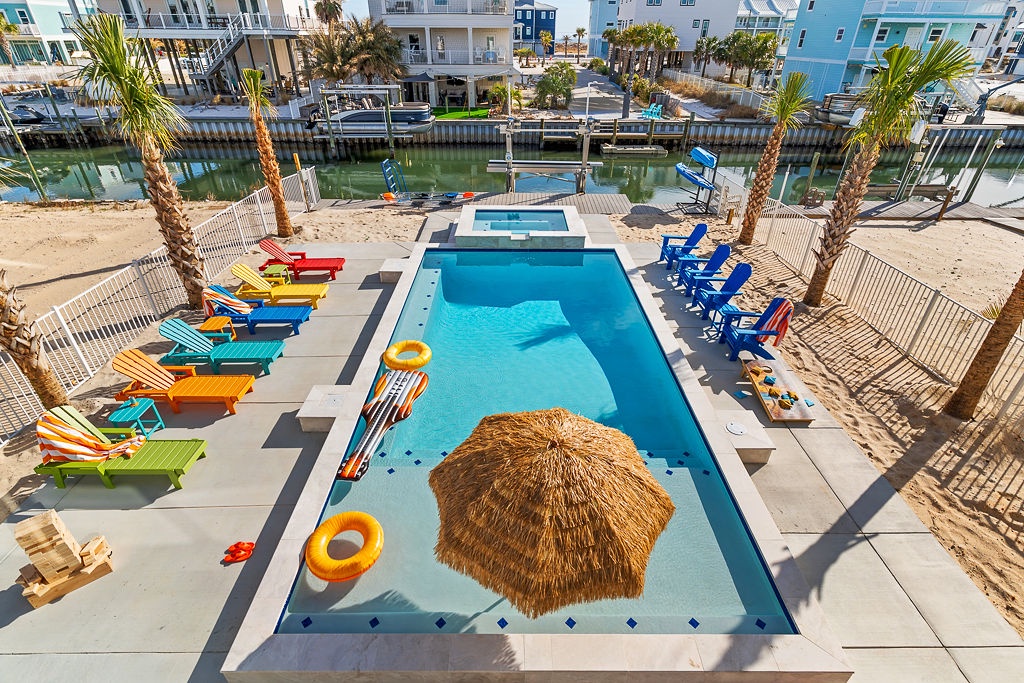
2. What to Photograph
When in Doubt, Point the Camera at Everything
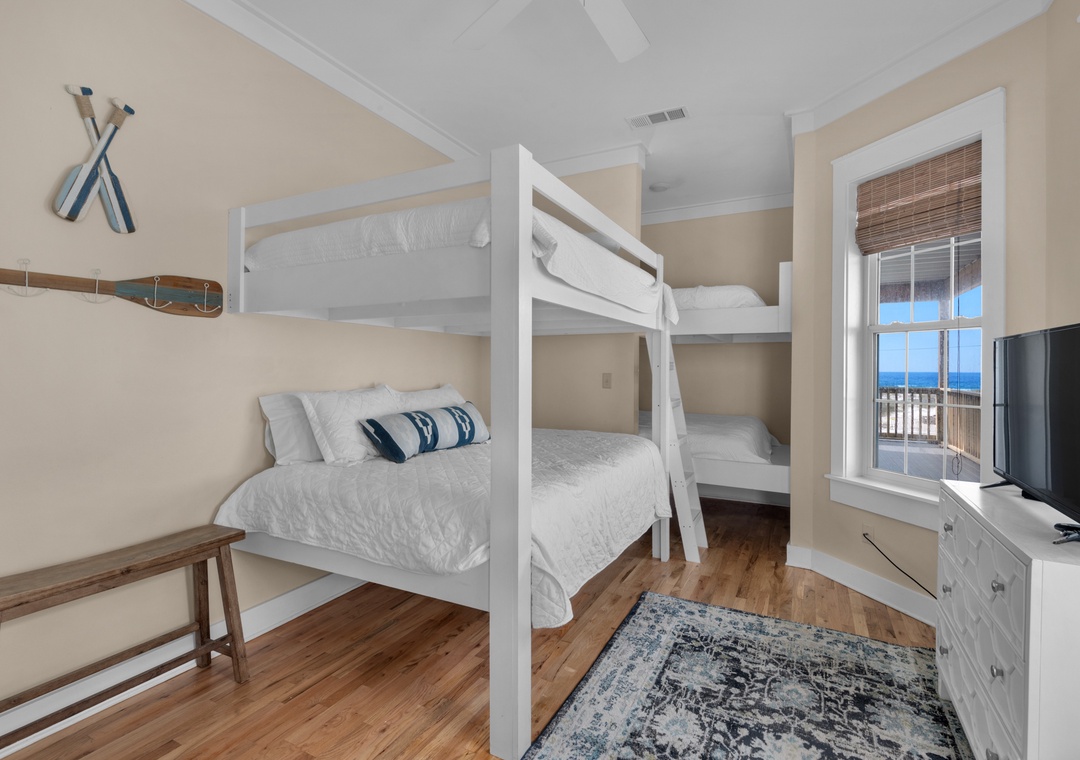
Photograph every guest-accessible space and show each room from multiple angles.
Guests want a complete visual tour, not a teaser. Plan for at least twenty five photos that include bedrooms, bathrooms, living areas, kitchen, dining, and any extra spaces. Add outdoor areas, porches, decks, and shared amenities when available.
Use three perspectives per room to tell a full story. Start with a wide shot for layout, a mid shot for furniture and flow, and a close shot for texture and detail. The mix creates an inviting rhythm across your gallery.
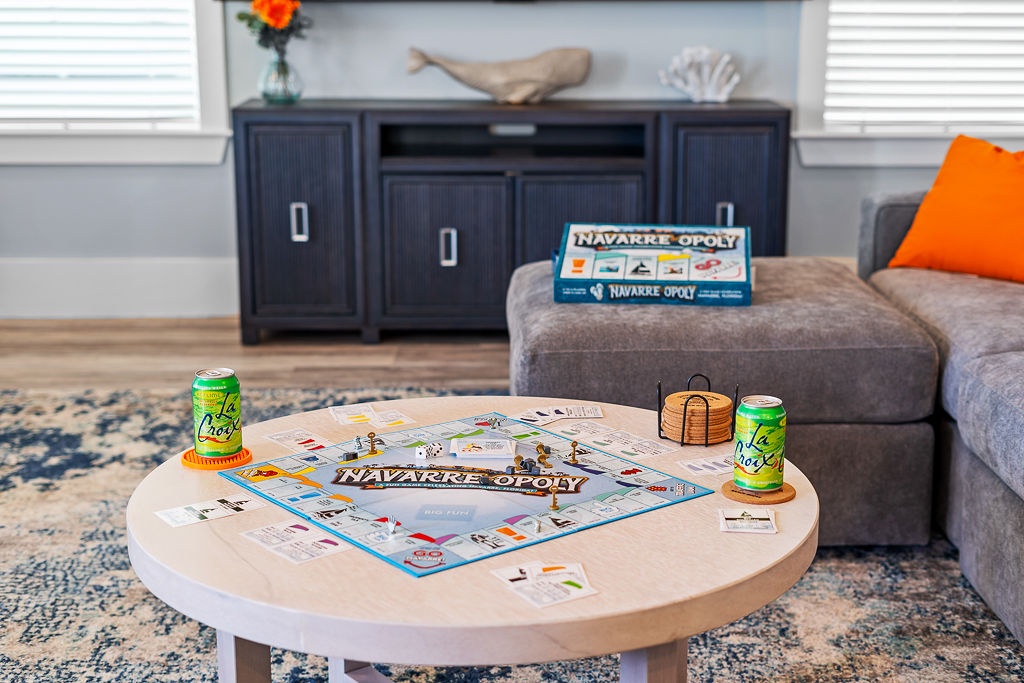
Pro Tip: Detail Shots That Invite People In
Close shots of fluffy towels, crisp sheets, or a styled coffee table add warmth. They hint at hospitality and care without saying a word. Think of them as visual asides that make the home feel lived in and loved.
Quick Takeaways
- Include every room that guests can use.
- Aim for at least twenty five total images.
- Capture wide, mid, and close shots per room.
- Do not forget exteriors and outdoor seating areas.
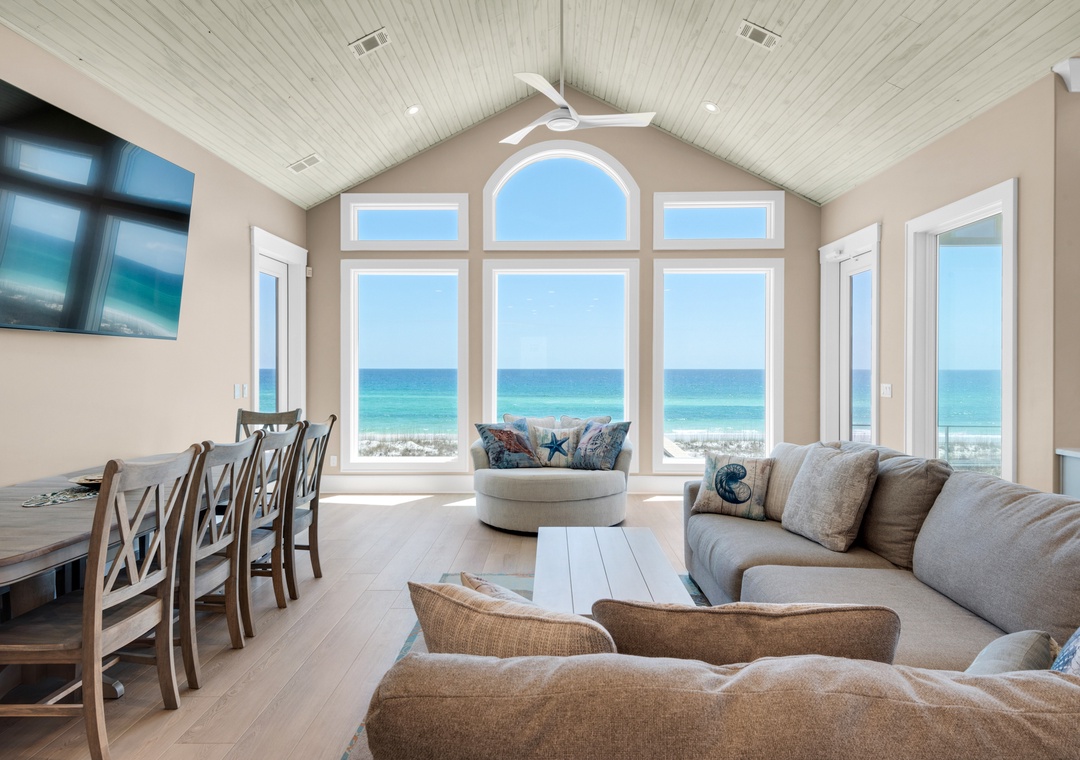
3. Finding Your Focus
The Room's Diva Deserves the Spotlight
Identify each room's standout feature and build your composition around it.
A fireplace, a king bed, or a framed coastal view can become the visual anchor. Put that element in the best light, then support it with context. The eye needs one clear star, then a supporting cast that feels intentional and calm.
Focus is not about vanity. It is about storytelling. A kitchen island can suggest family dinners and late night chats. A balcony scene can suggest sunrise coffee and an unhurried morning breeze.
Pro Tip: Practical Focal Point Moves
Shoot from a position that reveals the star plus the room's shape. Remove distracting items and simplify the background. Keep edges neat to avoid visual noise that pulls attention away from the main act.
Quick Takeaways
- Choose one clear focal point per room.
- Compose to highlight the star and show context.
- Remove clutter that competes for attention.
- Use focal points to suggest lifestyle moments.

4. Lighting
The Sun is Free, So Use It Generously
Favor natural daylight and support it with all available interior lights.
Light determines mood, clarity, and perceived size. Open curtains wide and let the Gulf Coast sun fill the space. Early mornings and late afternoons create soft tones that flatter interiors and reduce harsh contrast.
Turn on every lamp and overhead light to lift corners. Balanced lighting keeps window views from blowing out and dark corners from collapsing. The goal is simple: bright, even, and welcoming.
Pro Tip: Timing and Balance
Avoid harsh midday light that creates hard shadows and glare. If needed, adjust blinds slightly to soften highlights. Keep color temperatures consistent so rooms feel calm and cohesive.
Quick Takeaways
- Shoot by day with curtains open.
- Use early or late light for soft results.
- Switch on all indoor lights for balance.
- Keep light even to flatter every corner.
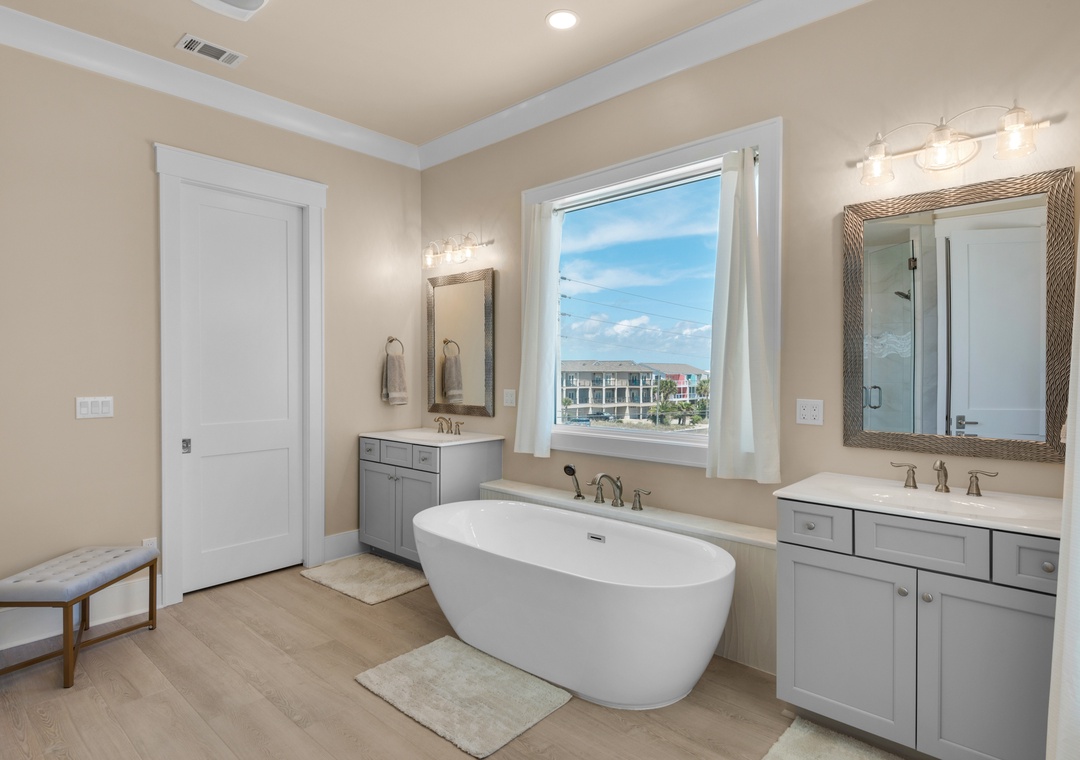
5. Staging the Ambiance
Pretend You Are Hosting Martha Stewart, Not Your Cousin
Clean thoroughly, declutter, and add small props that suggest comfort and care.
Photos are invitations to a future stay. Fresh flowers, styled pillows, and neatly folded towels signal hospitality. A set dining table can hint at family meals and easy conversation.
Keep it real and simple. Remove personal items and paperwork. Edit surfaces so they feel calm and purposeful. Staging is not fiction. It is a focused version of your home at its best.
Pro Tip: Small Touches, Big Impact
Style one or two vignettes per room only. Place a book and candle on the coffee table or a carafe of water by the bed. Let each scene breathe so it reads quickly and feels natural.
Quick Takeaways
- Clean deeply and clear visual clutter.
- Add flowers, pillows, and tidy linens.
- Style tables and counters with restraint.
- Avoid personal photos and random items.
6. Playing with Angles
Corners Are Your Friends, Walls Are Your Enemies
Shoot into corners for depth and include a touch of floor and ceiling for scale.
Angles shape how people feel the room. Straight on wall shots flatten space and make rooms seem narrow. Corner compositions add dimension and create a comfortable sense of volume.
Keep the camera at about hip to chest height for most rooms. That viewpoint feels natural and reads layouts clearly. A tripod helps with steady frames and consistent horizons.
Pro Tip: Build a Room's Mini Sequence
Try two or three wide shots per room from different corners. Add one mid shot that shows seating arrangements or a work surface. Finish with a detail that conveys texture or personality.
Quick Takeaways
- Aim at corners to add depth and life.
- Include floor and ceiling to show proportions.
- Use a tripod for sharp, level images.
- Build a sequence: wide, wide, mid, detail.
7. Portrait vs. Landscape
Horizontal Rules, Vertical Charms
Use landscape for room overviews and portrait for tall features or details.
Most booking platforms present landscape images more naturally. Horizontal frames reveal layout and flow with less cropping. They also feel comfortable on laptops and tablets that guests still use for planning.
Portrait orientation has a role. Use it for staircases, vertical art, tall plants, or balcony railings. Treat portrait images like exclamation points that add variety to your gallery.
Pro Tip: Keep the Rhythm Consistent
Lead each room with a landscape overview before any portrait details. This maintains clarity and prevents visual whiplash. Guests will appreciate the steady cadence.
Quick Takeaways
- Favor landscape for the big picture.
- Save portrait for vertical moments.
- Start rooms with horizontal overviews.
- Mix orientations with intention, not habit.
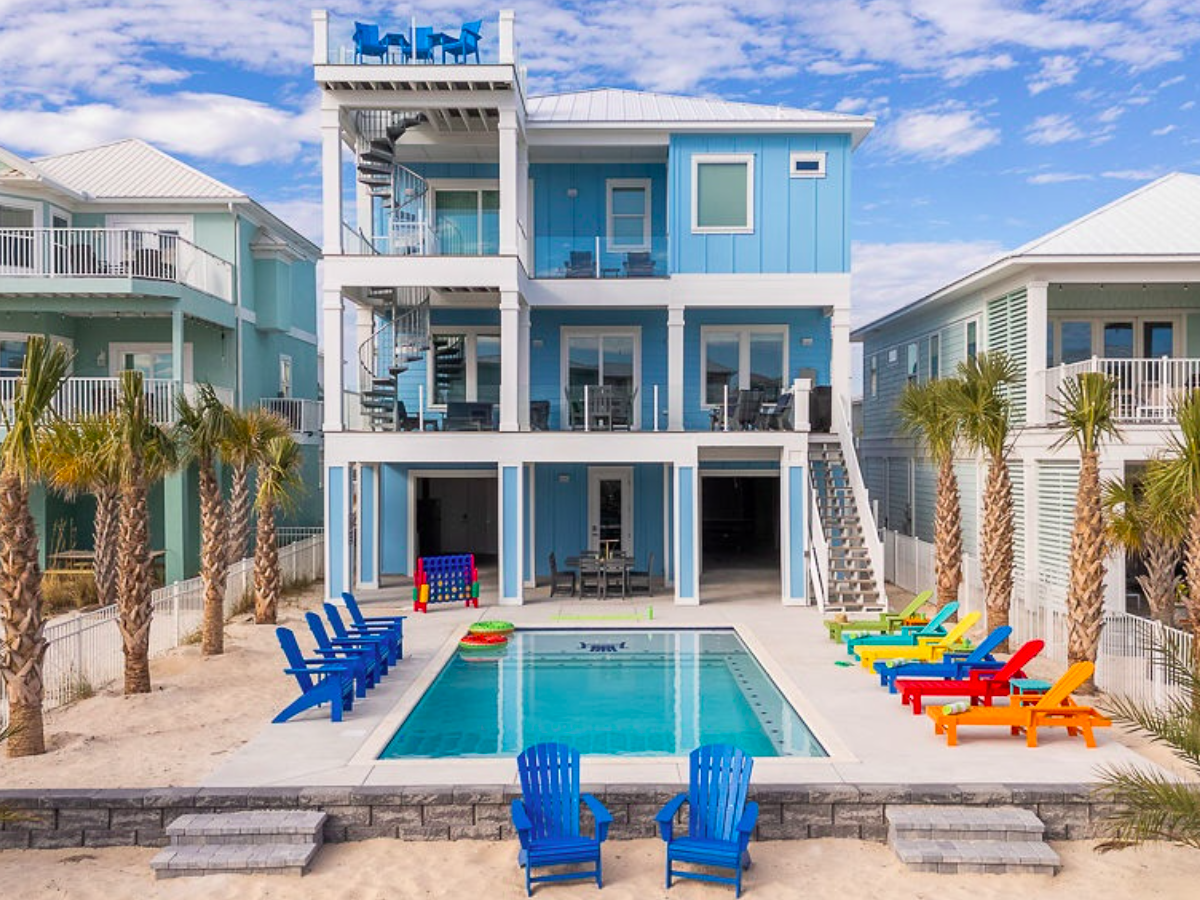
8. The Hero Image
First Impressions Wear Capes
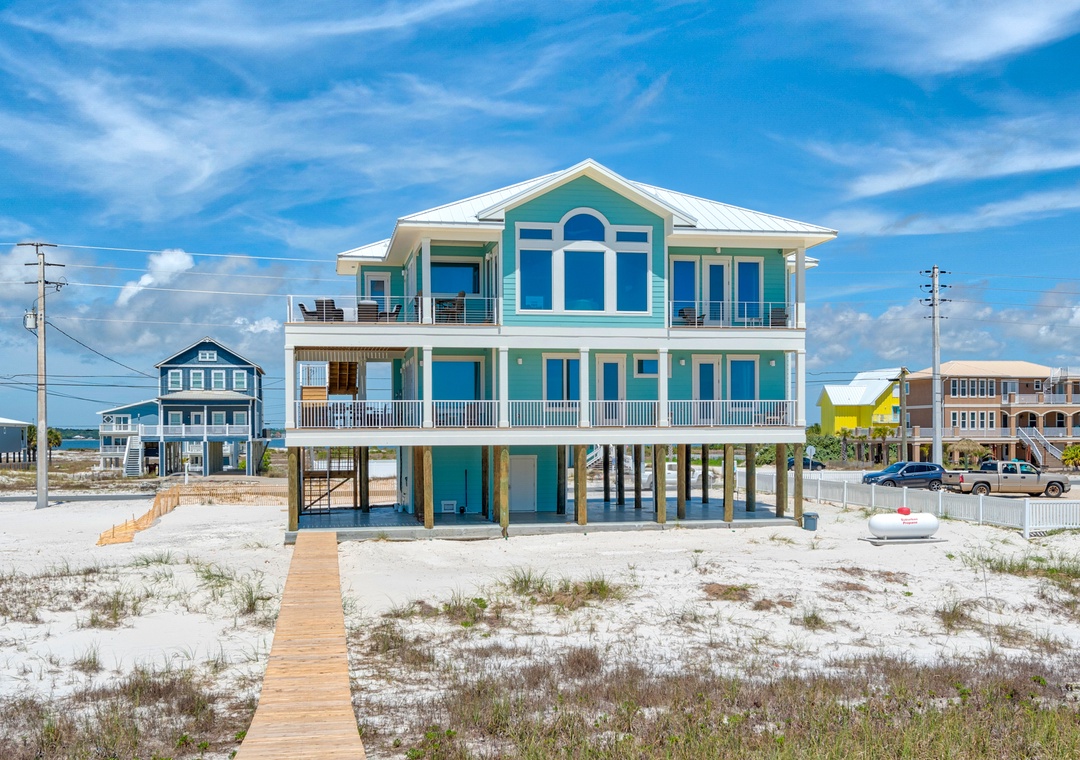
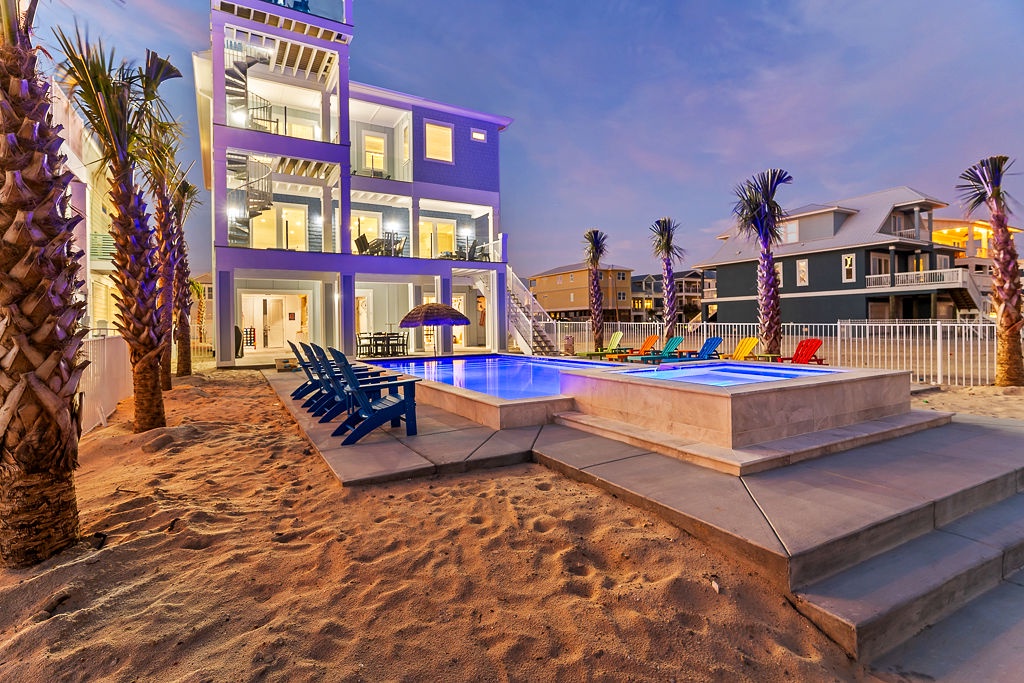
Select one image that stops the scroll and shows your strongest feature first.
This could be a sunlit living room or a balcony view that hints at sea and sky. The hero image is your cover art. It should make guests imagine bags on the floor and keys on the counter.
Consider an exterior or elevated angle if it tells the whole story fast. Proximity to sand, outdoor seating, or a sparkling pool can all read within a second. The hero sets the emotional tone for everything that follows.
Pro Tip: Test the Hero With One Question
Ask yourself if you would click this image among a wall of listings. If the answer is not instant, keep refining. Shift the angle, wait for better light, or simplify the scene.
Quick Takeaways
- Lead with your strongest, most inviting scene.
- Choose an image that communicates in one second.
- Show lifestyle, not just architecture.
- Refine until it earns a confident click.
9. DIY vs. Professional Photography
Your Smartphone Is Not a Magician, Sorry
DIY can work with care, but a professional brings gear, editing, and a trained eye.
If budget allows, hiring a photographer is a strategic move. Professionals understand light, composition, and post processing that creates clean, consistent results. They also work quickly, which can save you time and guesswork.
DIY still succeeds with patience. Follow the rules for light, angles, and staging. Take more frames than you think you need, then edit ruthlessly. The goal is clarity and warmth, not special effects.
Pro Tip: When to Consider a Pro
Launches, seasonal refreshes, and new amenity upgrades are perfect moments. A polished set can boost listing views and help raise rates with confidence. Think of it as an upgrade to your entire marketing presence.
Quick Takeaways
- Pros deliver consistent, polished galleries.
- DIY demands patience and careful editing.
- Re photograph after upgrades or improvements.
- Treat great photos as a long term investment.
10. Be Truthful
Photoshop Cannot Fix a Bad Review
Represent your property accurately to avoid disappointment and protect reviews.
Guests can forgive small imperfections. They do not forgive surprises. Photos that exaggerate size or crop out crucial context may create short term bookings but long term problems.
Choose honesty with style. If a view is partial, show it as partial and let other strengths shine. A truthful gallery keeps expectations aligned with reality, which is the foundation for happy stays.
Pro Tip: A Fast Honesty Check
Before uploading, ask three questions. Do these photos reflect the real space? Could any angle mislead a guest? Am I hiding a trait on purpose? Adjust as needed.
Quick Takeaways
- Accuracy beats exaggeration every time.
- Do not crop or edit in a deceptive way.
- Set realistic expectations to protect reviews.
- Trust grows from honest representation.
Choose Gulf Coast Getaways as Your Trusted Partner
At Gulf Coast Getaways, we've spent over two decades helping Navarre Beach and Pensacola Beach properties succeed. From maximizing revenue to creating memorable guest experiences, we know what it takes to keep rentals competitive.
Get in touch with us for a free revenue projection. Let us help you unlock your property's full potential today.